It’s that time of year. Now that warmer weather has finally arrived, so too has the desire to clean and declutter.
But this year isn’t like every other year. With more people at home and stores being closed for the moment, it will take a little more planning to prepare, organize and store your items for when resellers reopen and can resume taking donations.
We’re here to help, with these 7 steps to help organize your donations while staying home. By following these steps, you'll clean your crowded house, assist donation centers in managing the flow of merchandise, and protect the environment by keeping usable items out of the trash.
1. Determine what to donate

First things first: You need to decide what you can part with, and what you can’t.
Need a little inspiration or just aren’t sure where to start? First, think seasonally. Now might not be the best time to donate a snowsuit, but it’s a great time to part with your old golf clubs. Your kids’ old flippers and goggles? Bid them goodbye now, while saving your old holiday decorations for a fall donation.
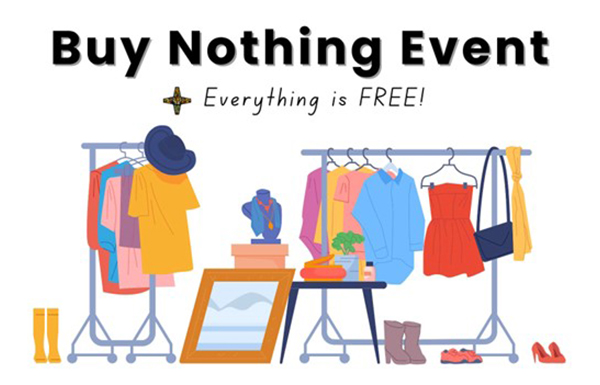
You might find there are some things you never considered or knew could be donated. Things like: shoes, unused or outdated laptops, jewelry, coffee mugs, clothes hangers, stuffed animals, old Halloween costumes, or puzzles and games no one plays with anymore. From old eyeglasses to sectional sofas, the possibilities are nearly endless.
Remember, not everything can be donated. Visit the websites of the organizations you’re considering donating to. They’ll list the items they can accept and those they cannot (they’ll also list their social distancing and safety guidelines related to donation). Torn clothing, chipped dishes, games without all the pieces…sadly, these items aren’t candidates for reuse. It’s best to throw them out. Check our Green Disposal Guide for additional information.
We promise, you’ll feel a significant sense of accomplishment from clearing out the stuff you no longer need. After all, not only will your space be more livable, you’ll have the satisfaction of knowing that usable everyday items will be on their way to having a second life in the homes of people who need them.
2. Prepare your donations

Once you’ve determined what to donate, get your items ready for donation. Organizations want donated goods to be clean. Even if some of these items haven’t been used or worn for a long time, we recommend washing clothing, linens and even stuffed animals. Wipe down things like pots and pans, games, and toys. Different organizations will have different conditions for acceptance of donations, so visit their websites to get that information.
If you feel like going the extra mile, you can even separate your items into useful categories (e.g., clothes, shoes, decorations, housewares, etc.). Second-hand stores organize and sort goods as part of their intake process, so classifying and separating items upfront helps them save time.
Remember, the whole point of donating is to enable usable goods to have a second life so that they stay out of the trash and can bring value to other people’s lives. So take the time to give your goods the best chance for reuse by ensuring the items you donate are in good condition and ready for retail!
Tip: If you’re donating things like clothes, bags, or purses, be sure to check all of the pockets before donating to make sure you didn’t leave anything inside.
3. Organize your donations in bags or boxes

Now that you’ve cleaned out that basement closet and know what you’re donating, it’s a good idea to make sure these items aren’t just lying around your house. As mentioned above, we recommend separating your items into categories (by types of goods, and further by their eventual destinations). Boxes should be easy to carry. And if you’re unable to donate right away, you’ll want them to be easy to store. In other words, think smaller boxes vs. larger ones. When the time comes to send them on their way, you’ll be glad you took the time to organize.
4. Label the bags or boxes
This one is important. Without labels on the bags or boxes, they could easily get misplaced or mistaken for trash. This is especially true if your items won’t be donated immediately after collection. Be sure to mark that they are for donation. If you separated them into categories, note that on the bag or box, or at the very least write down what’s inside.
Tip: If you already know where you’d like to donate the items once you’re able to, you can mark that on the bag or box too.
5. Find a place to store your donations
Under ordinary circumstances, you could temporarily store items for donation in your car, then drop them off on your way to work or while running errands. But due to COVID-19, most of us have curtailed our outside activities, and many businesses are temporarily closed. That being the case, try to find a good place to store your donations for the time being. What you don’t want is for them to be in the way or to become an eyesore that frustrates you to the point where you just toss them.
Not everyone has the same amount of available space for storing items, but here are a few ideas:
- Your garage
- An available closet
- Under a bed
- A spare bedroom
- The corner of a room with available space
- Your basement
If you absolutely need to be rid of these items right away, try listing them for free on Craigslist or the Nextdoor app before disposing of them in the trash. Maybe someone will take them off your hands.
Tip: Regardless of where you decide to store your donations, be sure it’s in a dry area safe from critters.
6. Decide where to donate your items
Once the dust settles and you’re able to donate again, make sure you have an idea of where you’d like to donate or drop off the items. You’ll also want to make sure these locations are in fact open again before you drop off.
Not sure where to donate? If there’s an organization that’s near and dear to your heart, start there. Ask friends or family where they usually donate their household items. Or do a simple search here.
As we stated earlier, be sure to visit the donation sites online prior to going in person. You’ll want to know their social distancing and safety guidelines. For example, some will request that you stay in your car while they remove items from your trunk. Following their instructions will make the process easier – and safer – for everyone.
Tip: If you plan to donate a lot of items or if you just want to track what you’ve donated, here is a charitable gifts and donations tracker you can use.
7. Alternatives to Storing Your Donations
We understand that holding onto your donations might be easier said than done. You may find that you don’t have space to store your items once you’ve organized them into boxes or bags or that you’re just ready to part with them sooner rather than later. Some organizations will pick up your donations for you. As they reopen, check with them to see if they provide this service.
Tip: Be sure to research locations and services for legitimacy so that your stuff goes to the actual location you intend it to.

It’s great that you’re getting organized and cleaning your house or garage or whatever space you decide to declutter. We love the motivation! We also know that it can be tough to let those items sit once you’ve had that initial momentum. Just know that donating those items will have a much bigger and better impact than throwing them away. So we’re asking you to hold onto them just a little while longer – knowing that the effort you’ve made to organize your donations will help ensure that they stay out of the trash and quickly find their way to people who will appreciate and use them.